
Understanding the V-Carve Inlay Workflow
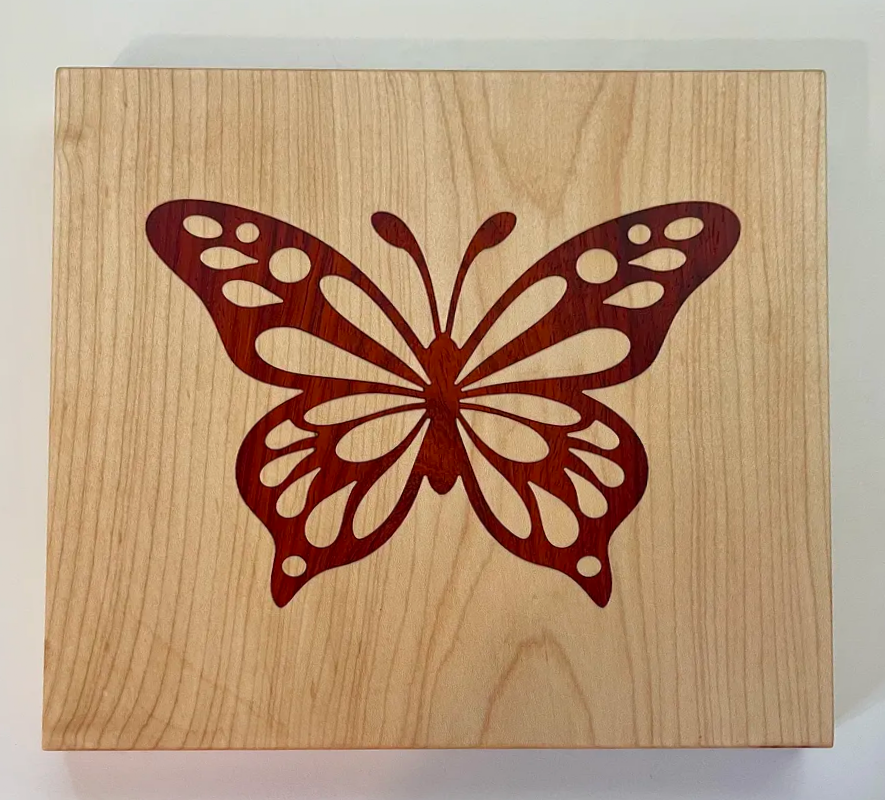
Butterfly Project Photos provided by Richard Campbell
The V-Carve Inlay feature generates two separate workpieces:
The pocket is the part of the inlay that is hollowed out to accept the plug. It is a V-carved recess cut into the main workpiece using a V-bit. Because the carve is made with a V-bit, the walls of the pocket are angled.
Plug
The plug is the part of the inlay that is cut out and is set into the pocket. It is carved separately—typically from a contrasting wood species—and uses the same V-bit geometry so it fits tightly into the pocket.
Getting Started
Create a New Easel Project
Start by opening a new Easel project. Add a design element that will serve as the template for your inlay.
Make sure the design element’s dimensions and the material dimensions accurately match the size of the inlay you want to create.
We recommend that you have your materials and bits available while setting up the project so you can reference exact measurements.
| Important: Hardwood is strongly recommended for the Inlay Generator. Softwoods and plywood may not produce optimal results. |
Using the V-Carve Inlay App
Once you have your design and material at the correct dimensions, select it and click on the V-Carve inlay option on the left-hand toolbar. This will open the V-Carve Inlay application.
The Window will have:
- Bit configuration options on the left side
- A 3D preview on the right side
At the bottom of the preview is where you will set the material type for both the plug and the pocket. Next to those material selections is an eye icon. Clicking on the icon will remove the component from the preview. Clicking on it a second time will bring that component back.
Configuring the Inlay
Pocket Depth
At the top of the screen, you will see an option to set the “Pocket Depth.” This is where you will set the depth of the inlay.
Pocket Bit Settings
Below the pocket depth, you will be able to set the V-Bit depth for the inlay. The V-Bit that is set here will be used for both the pocket and plug.
You will also see a check box that allows you to add a roughing bit. If this is not checked, the pocket carve will only be carved with just the V-Bit.
Plug Settings
The Plug Stock section allows you to set the size of the material used for the plug carve. To the right of the section title is a readout showing the minimum required plug material size. Because the plug is imported with an offset, the material must meet this minimum size requirement.
Below that is the Plug Bits selection.
The plug carve uses three bits:
- Roughing bit
- Detail bit (the V-bit selected earlier)
- Outline bit
Since the V-bit was in the pocket section, you will only need to configure the roughing and outline bits here.
| Important: The plug material dimensions and thickness will be set automatically during the generation. |
Before Generating the Inlay
Carefully review all settings before continuing. The V-Carve Inlay workflow is one-directional. After generating the inlay workpieces, changes cannot be made within the workflow. If adjustments are needed, you must return to the original design and generate the inlay again.
Generating the Workpieces
Once all settings are complete:
- Click the blue Generate button
- Easel will generate the inlay into separate workpieces
- The workpiece transition menu will open at the bottom of the screen
The project’s workpieces will include:
- The original design
- The inlay pocket
- The inlay plug
| Important: Once the workpieces are created, it is recommended that you avoid modifying the generated designs. Editing the generated workpieces may alter the geometry of the inlay and could result in poor fitment between the pocket and plug. |
Simulating the Toolpaths
Once your workpieces have been generated, you can simulate the carvings to preview the toolpaths before carving begins.
In the lower-right corner of the screen, select Simulate to open the carving simulation. This allows you to visualize how the machine will move throughout the carve process and review the generated toolpaths before running the job on your machine.
After the simulation loads, all toolpaths will be displayed together by default. You can isolate specific toolpaths using the simulation controls to better inspect individual carving operations.
This is especially useful for:
- Verifying cutting order
- Reviewing roughing and detail passes
- Checking cutout operations
- Identifying potential carving issues before carving
Using the simulation preview is strongly recommended before starting the carve.
Carving and Assembly
After reviewing the simulation, you are ready to carve the parts. The carving process functions the same as any standard carve in Easel.
Once both the pocket and plug have been carved and cut out, you can begin assembly.
Assembling the Inlay
This video is a good representation of the entire assembly and finishing process:
https://www.instagram.com/reel/DaGNHQVuy-X/?utm_source=ig_web_copy_link&igsh=MzRlODBiNWFlZA==
Before applying wood glue, we recommend performing a dry fit to test how the plug fits into the pocket. This helps identify any fitment issues before final assembly.
You may notice that part of the plug extends above the surface of the pocket. This is intentional and helps make it easier to remove excess material after the glue-up process.
Gluing the Parts Together
For the best adhesion:
- Apply a layer of glue to both the pocket and the plug
- Ensure the plug is inserted evenly into the pocket
If the plug enters at an angle, gaps may appear along parts of the inlay.
Gluing and Clamping Images provided by Ryan Hagan
Clamping and Curing
While the glue cures, clamp the assembly or apply a consistent weight to the inlay to ensure a tight fit between the two parts.
Proper pressure during curing will help improve the final fit and appearance of the inlay.
Important: It is important to ensure that the glue is fully cured before removing the plug. Not letting the glue fully cure can cause the plug to shift.
Removing the Extra Plug
Once the parts have been assembled and the glue has fully cured, you can remove the excess plug material.
Removing the plug can be done in a number of ways. The plug can be cut via a coping saw or bandsaw and then either surfaced or sanded to make the plug flush with the pocket material.
You can also use your CNC machine and your existing Easel V-Carve Inlay project to surface the plug material down to the pocket material. That process would look like this:
In the V-Carve Inlay design, duplicate the plug workpiece.
In the duplicated workpiece, select the design and ungroup it. This will allow you to remove some of the parts of the design.
Remove all the extra bits and select only the bit you want to use to remove the plug.
Then select the cut outline and the white pocket and delete them. This should leave you with a single pocket carve.
This workpiece can then be carved to remove the excess plug. Be sure to zero to the top of the plug material and not the pocket material.
|
Important: We recommend measuring how far the plug sits above the pocket material and adjusting the depth of the pocket to match that measurement. If you want to be safe, you can leave the plug a little high and sand it the rest of the way flush. We also recommend setting the carve to carve from the center, as this will save time and not require you to change the material size. It is also important to check the cut setting for your bit. If you use a surfacing bit, the depth per pass will be much less and may need to be adjusted manually. |