
Although "depth per pass" and overall “cut depth” may seem insignificant for some carves, taking a moment to adjust these two settings can save you a lot of time when carving your project. These two settings impact how many passes your machine must take to complete a carve, and thus how much time it takes to complete a project. First, let's walk through the difference between these settings.
Overall depth is how deep the machine carves your project or different elements of your project. The overall depth is set using the depth slider in the "Cut" menu. Some projects will only carve partway into the material, whereas other projects may require you to carve all the way through your material.
Depth per pass is a cut setting that dictates how deeply your machine carves down into your material on each pass.
Unless you use the Easel Pro feature "Add Depth," you can only set the overall depth as the thickness of your material, which you can set in the “Material Dimensions” section in the upper right corner.
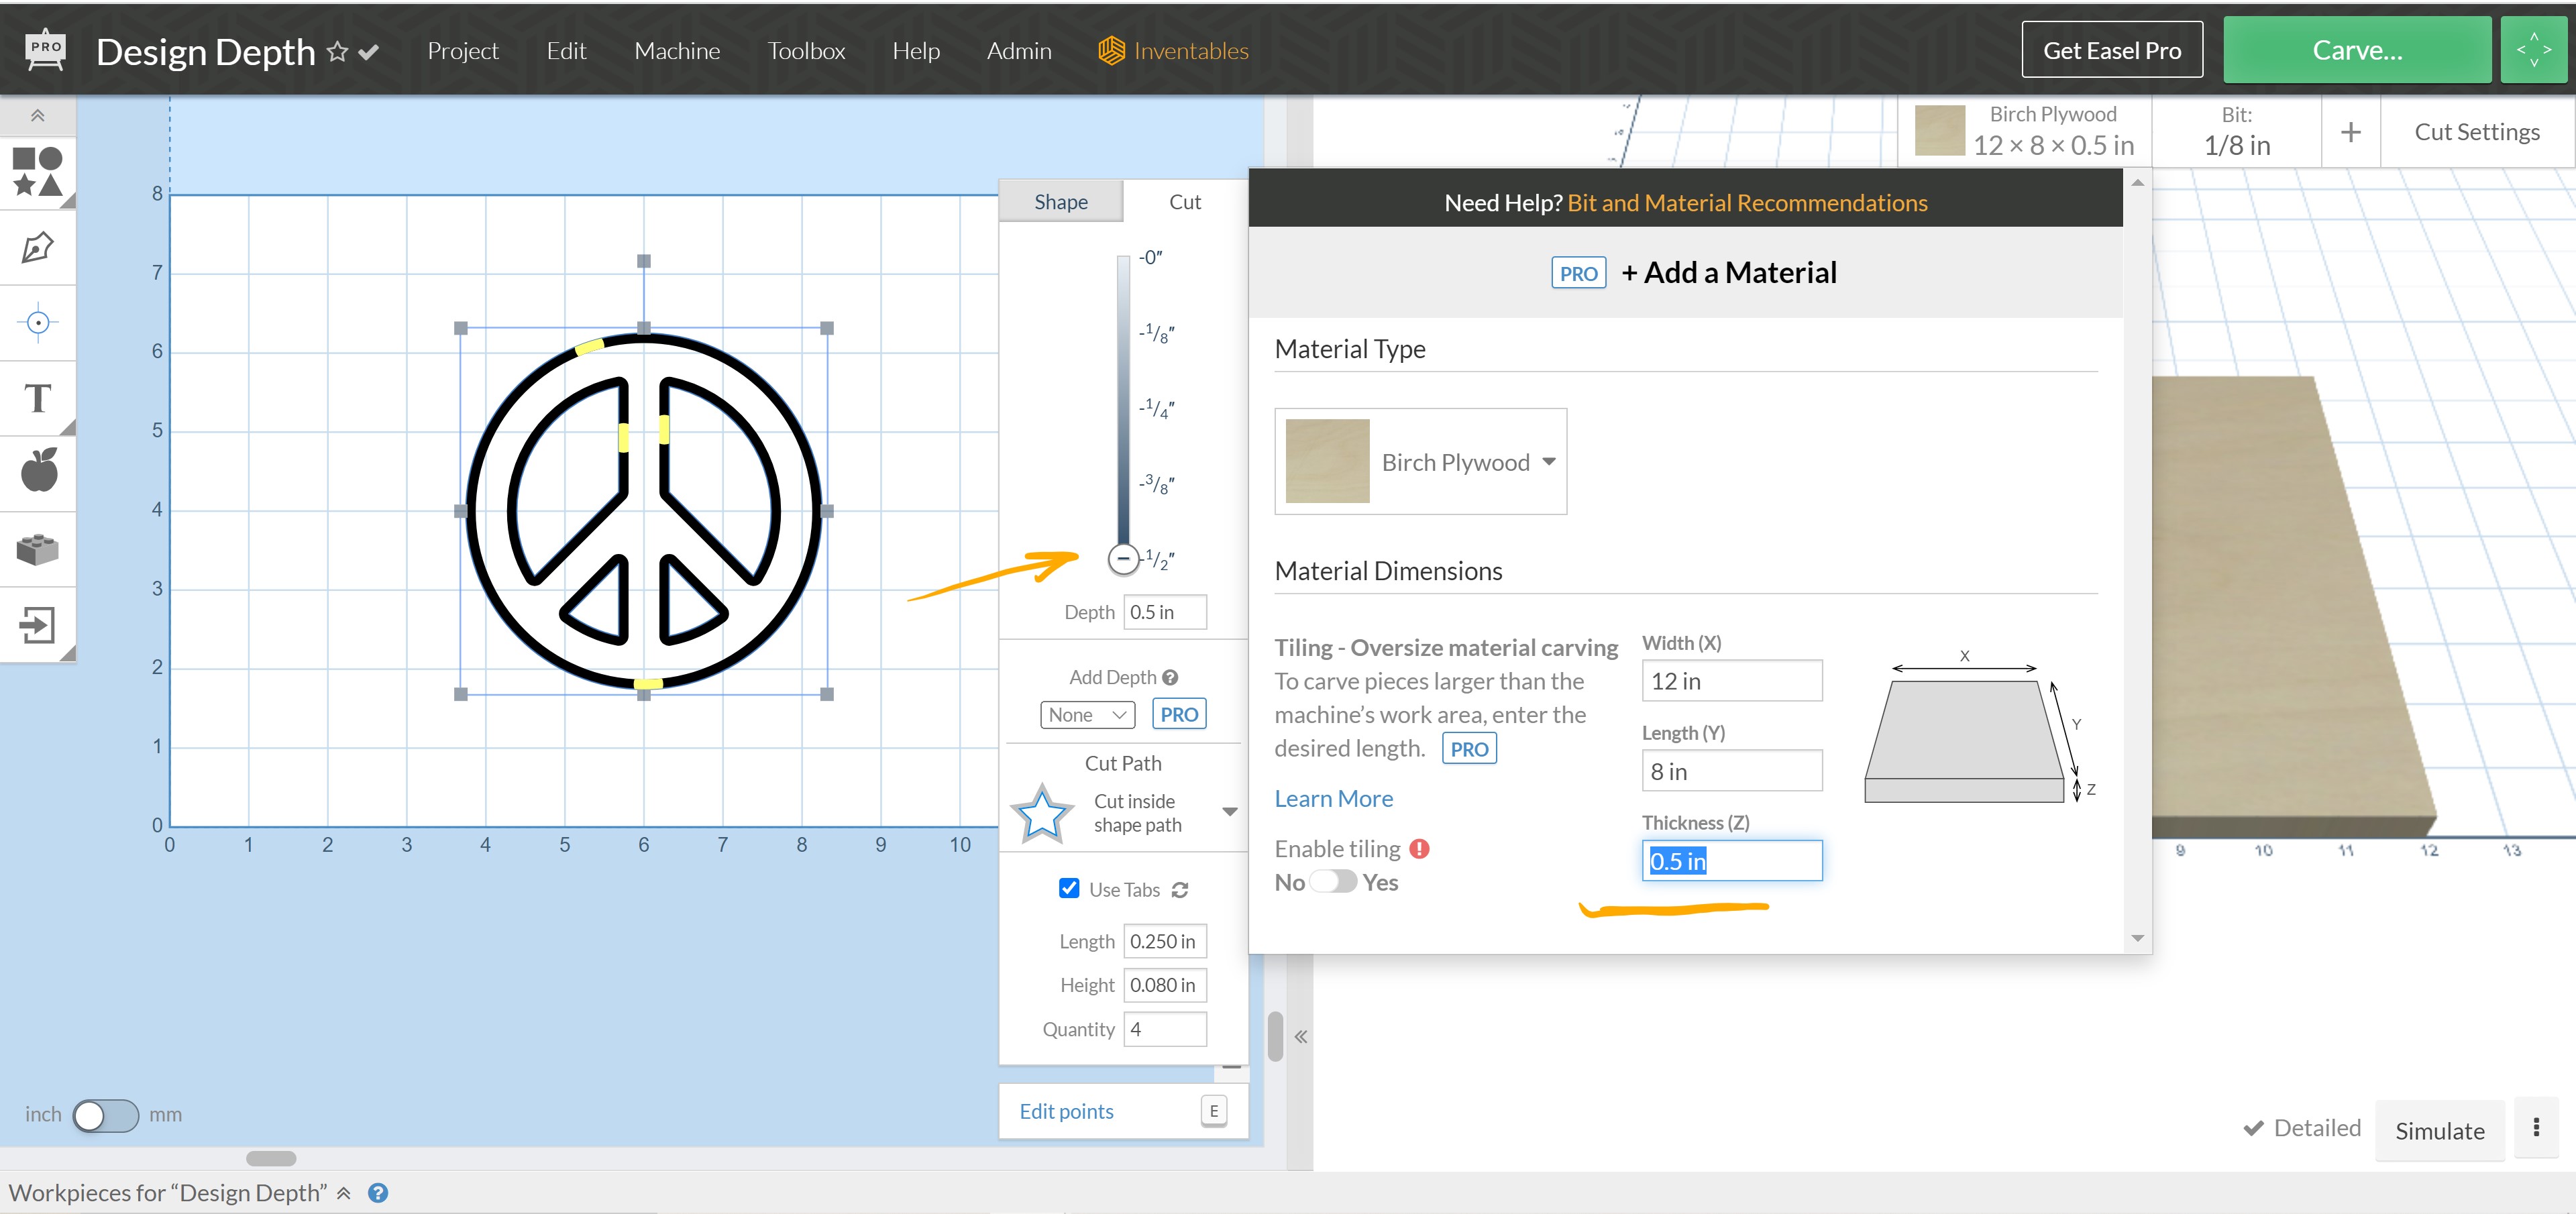
The darker your design is in the 2D design editor (the left side of the Easel program), the deeper it will cut into your material. You can use the slider to adjust your cut depth, or you can enter an exact depth in the space below the slider.
As a general rule, your depth per pass should never exceed half the diameter of your bit. For example, the depth per pass for a 1/4" (.25") bit should not exceed .125" per pass, the depth per pass for a 1/8" bit (.125") should not exceed .0625" per pass, etc.
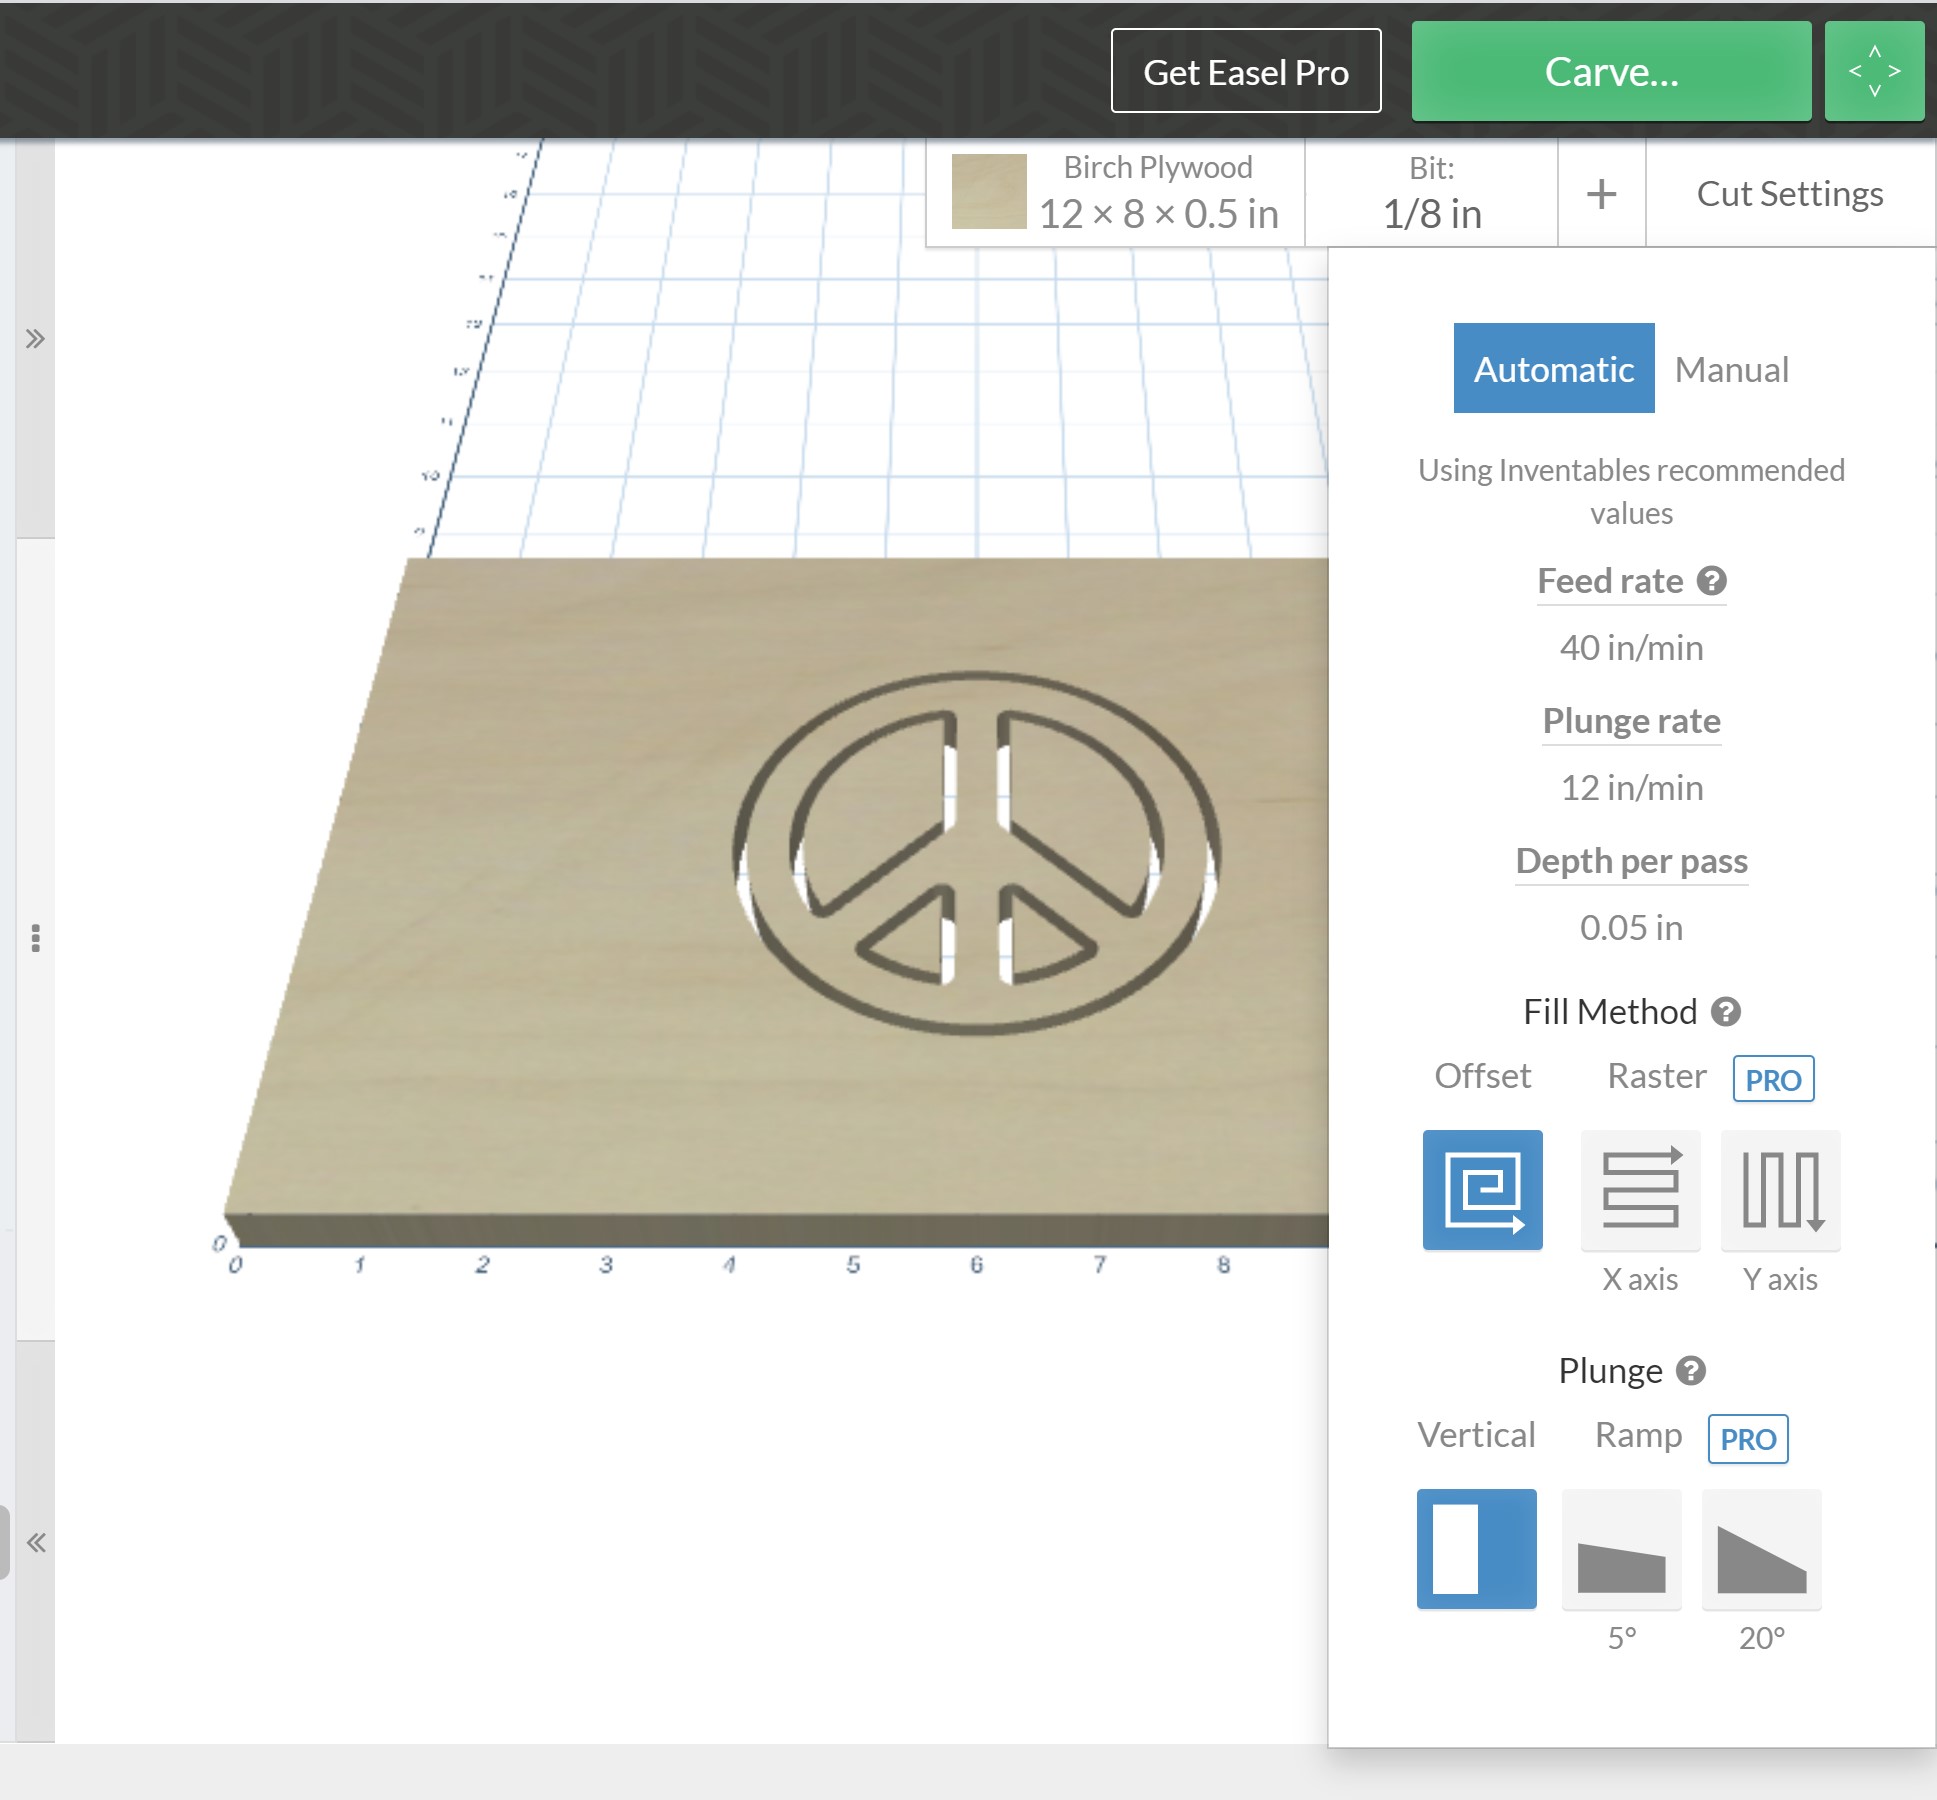
Unless you are cutting a very, very thin piece of material with a large bit, your project will likely require multiple passes to get the desired depth. You can change the Depth per pass setting under "Manual" in the Cut Settings.
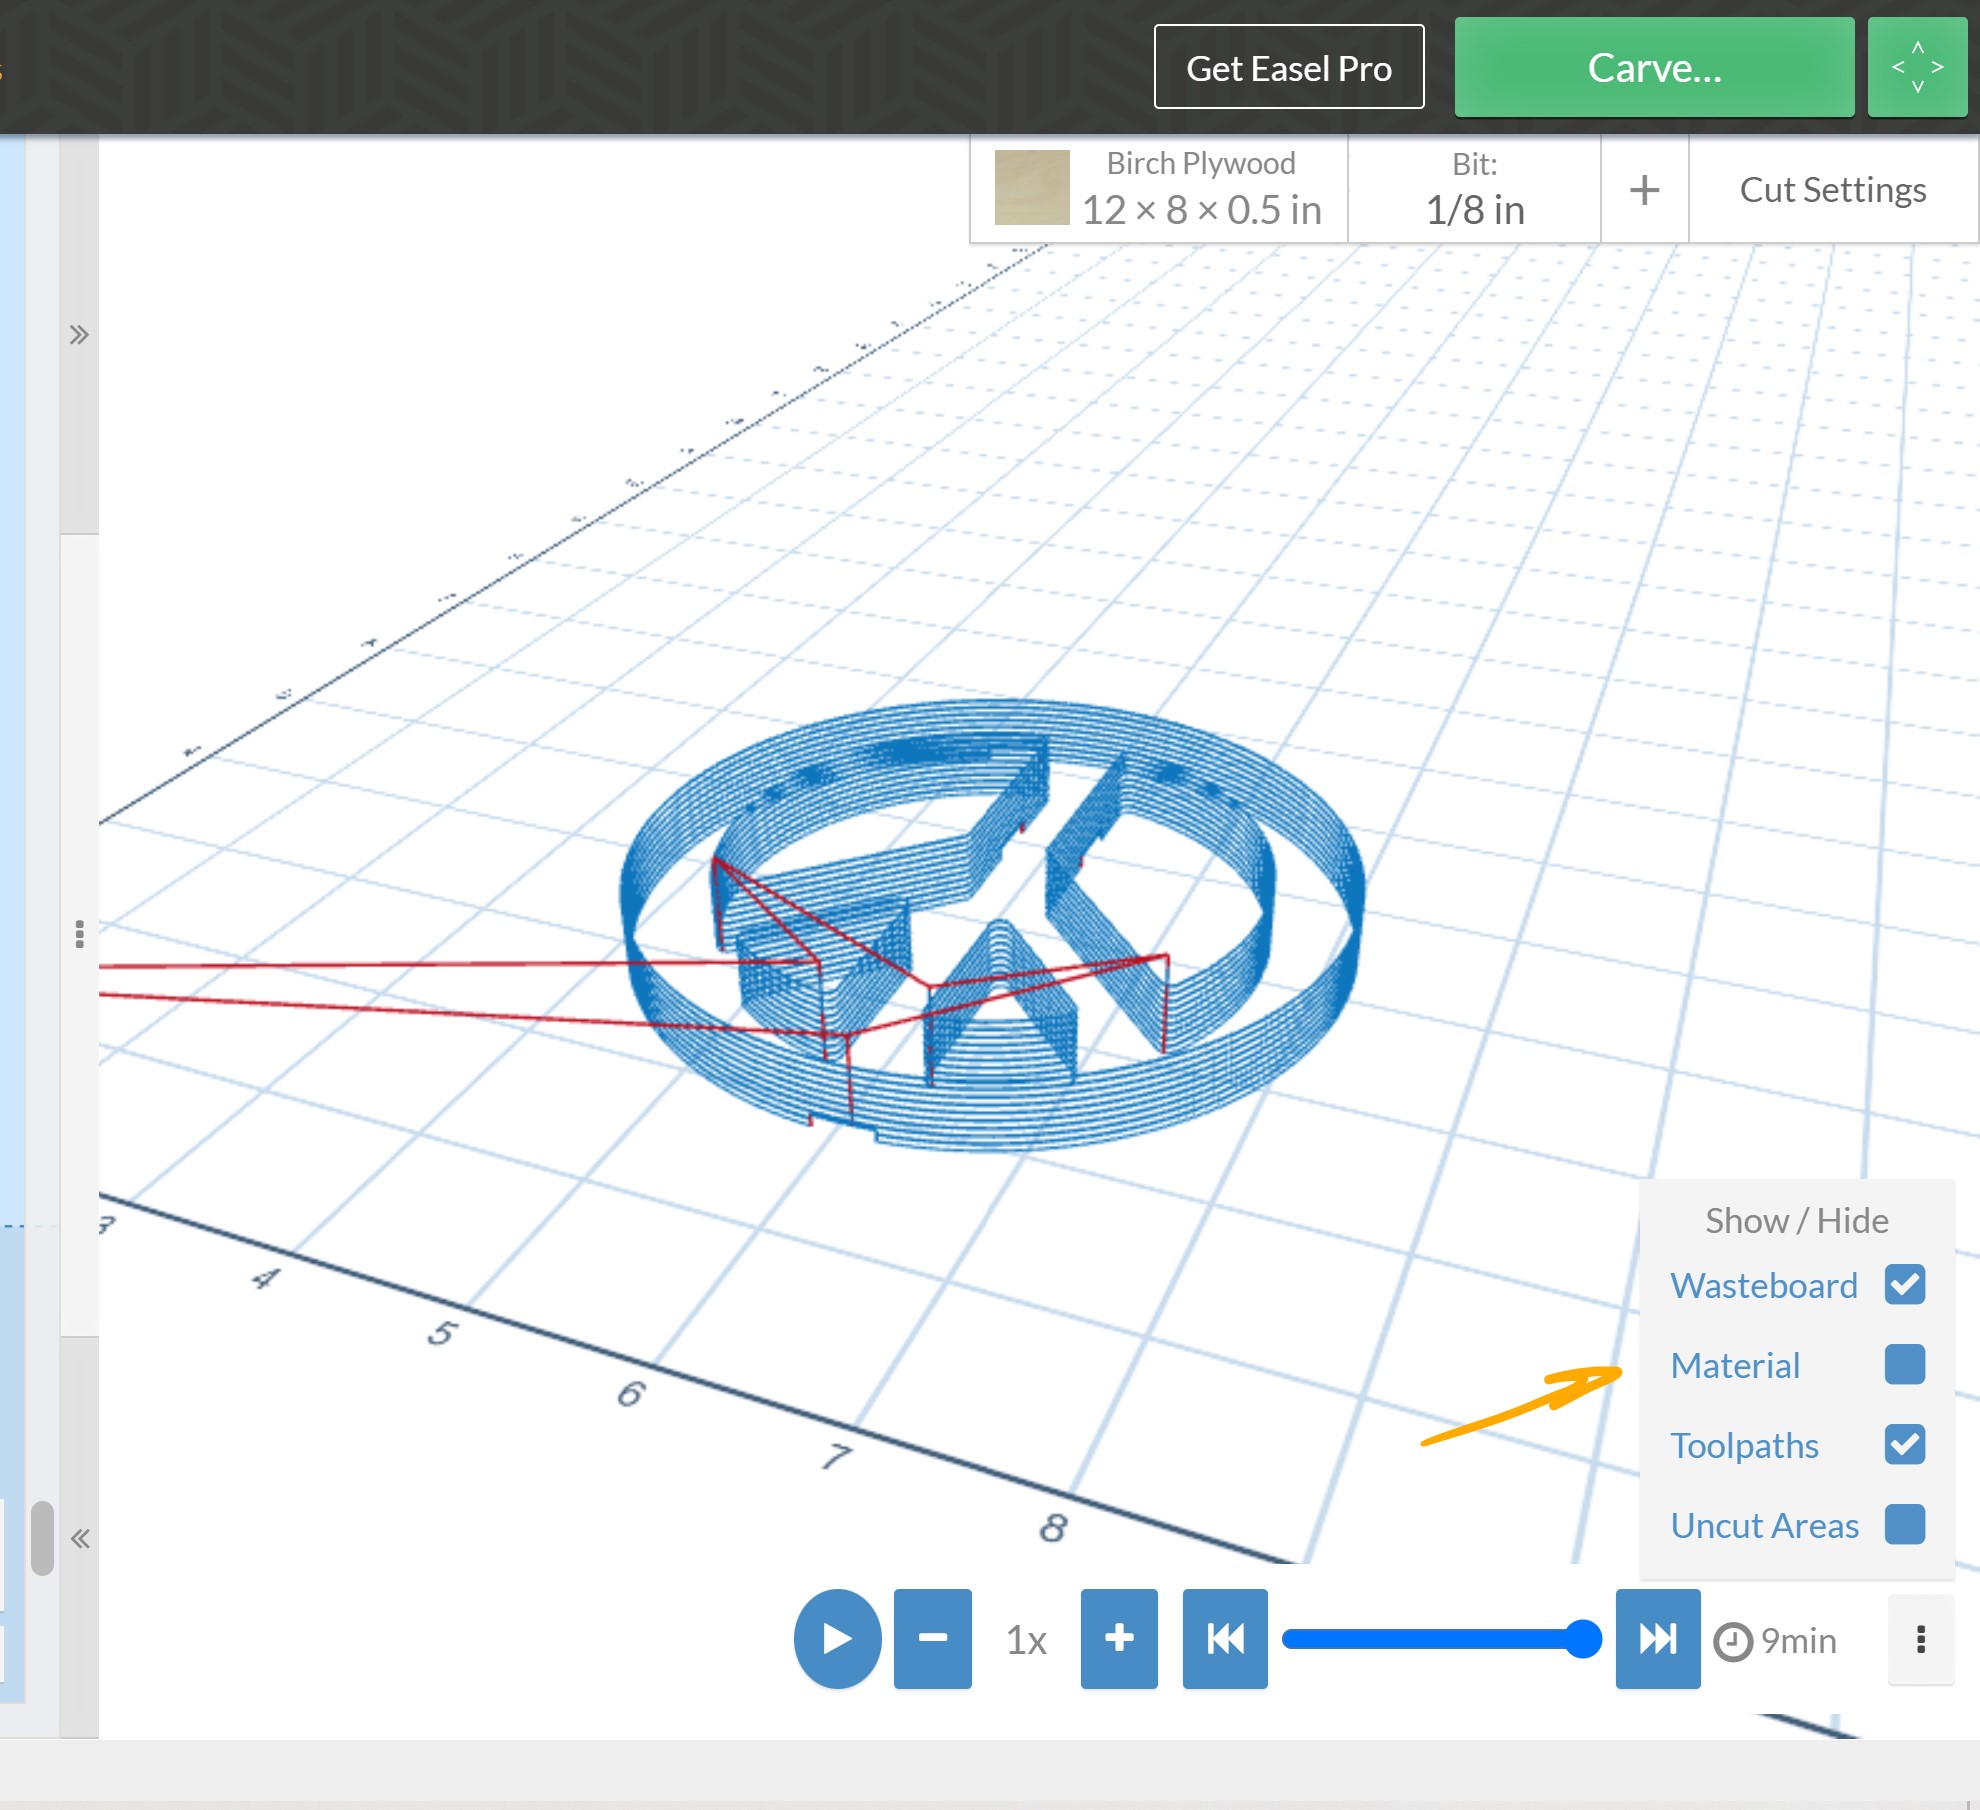
The number of passes your machine makes can be seen by hitting the "Simulate" button in the lower right corner of the Easel toolbar and hiding the "Material."
The way these two settings work in conjunction with one another is important for optimizing the efficiency of your machine.
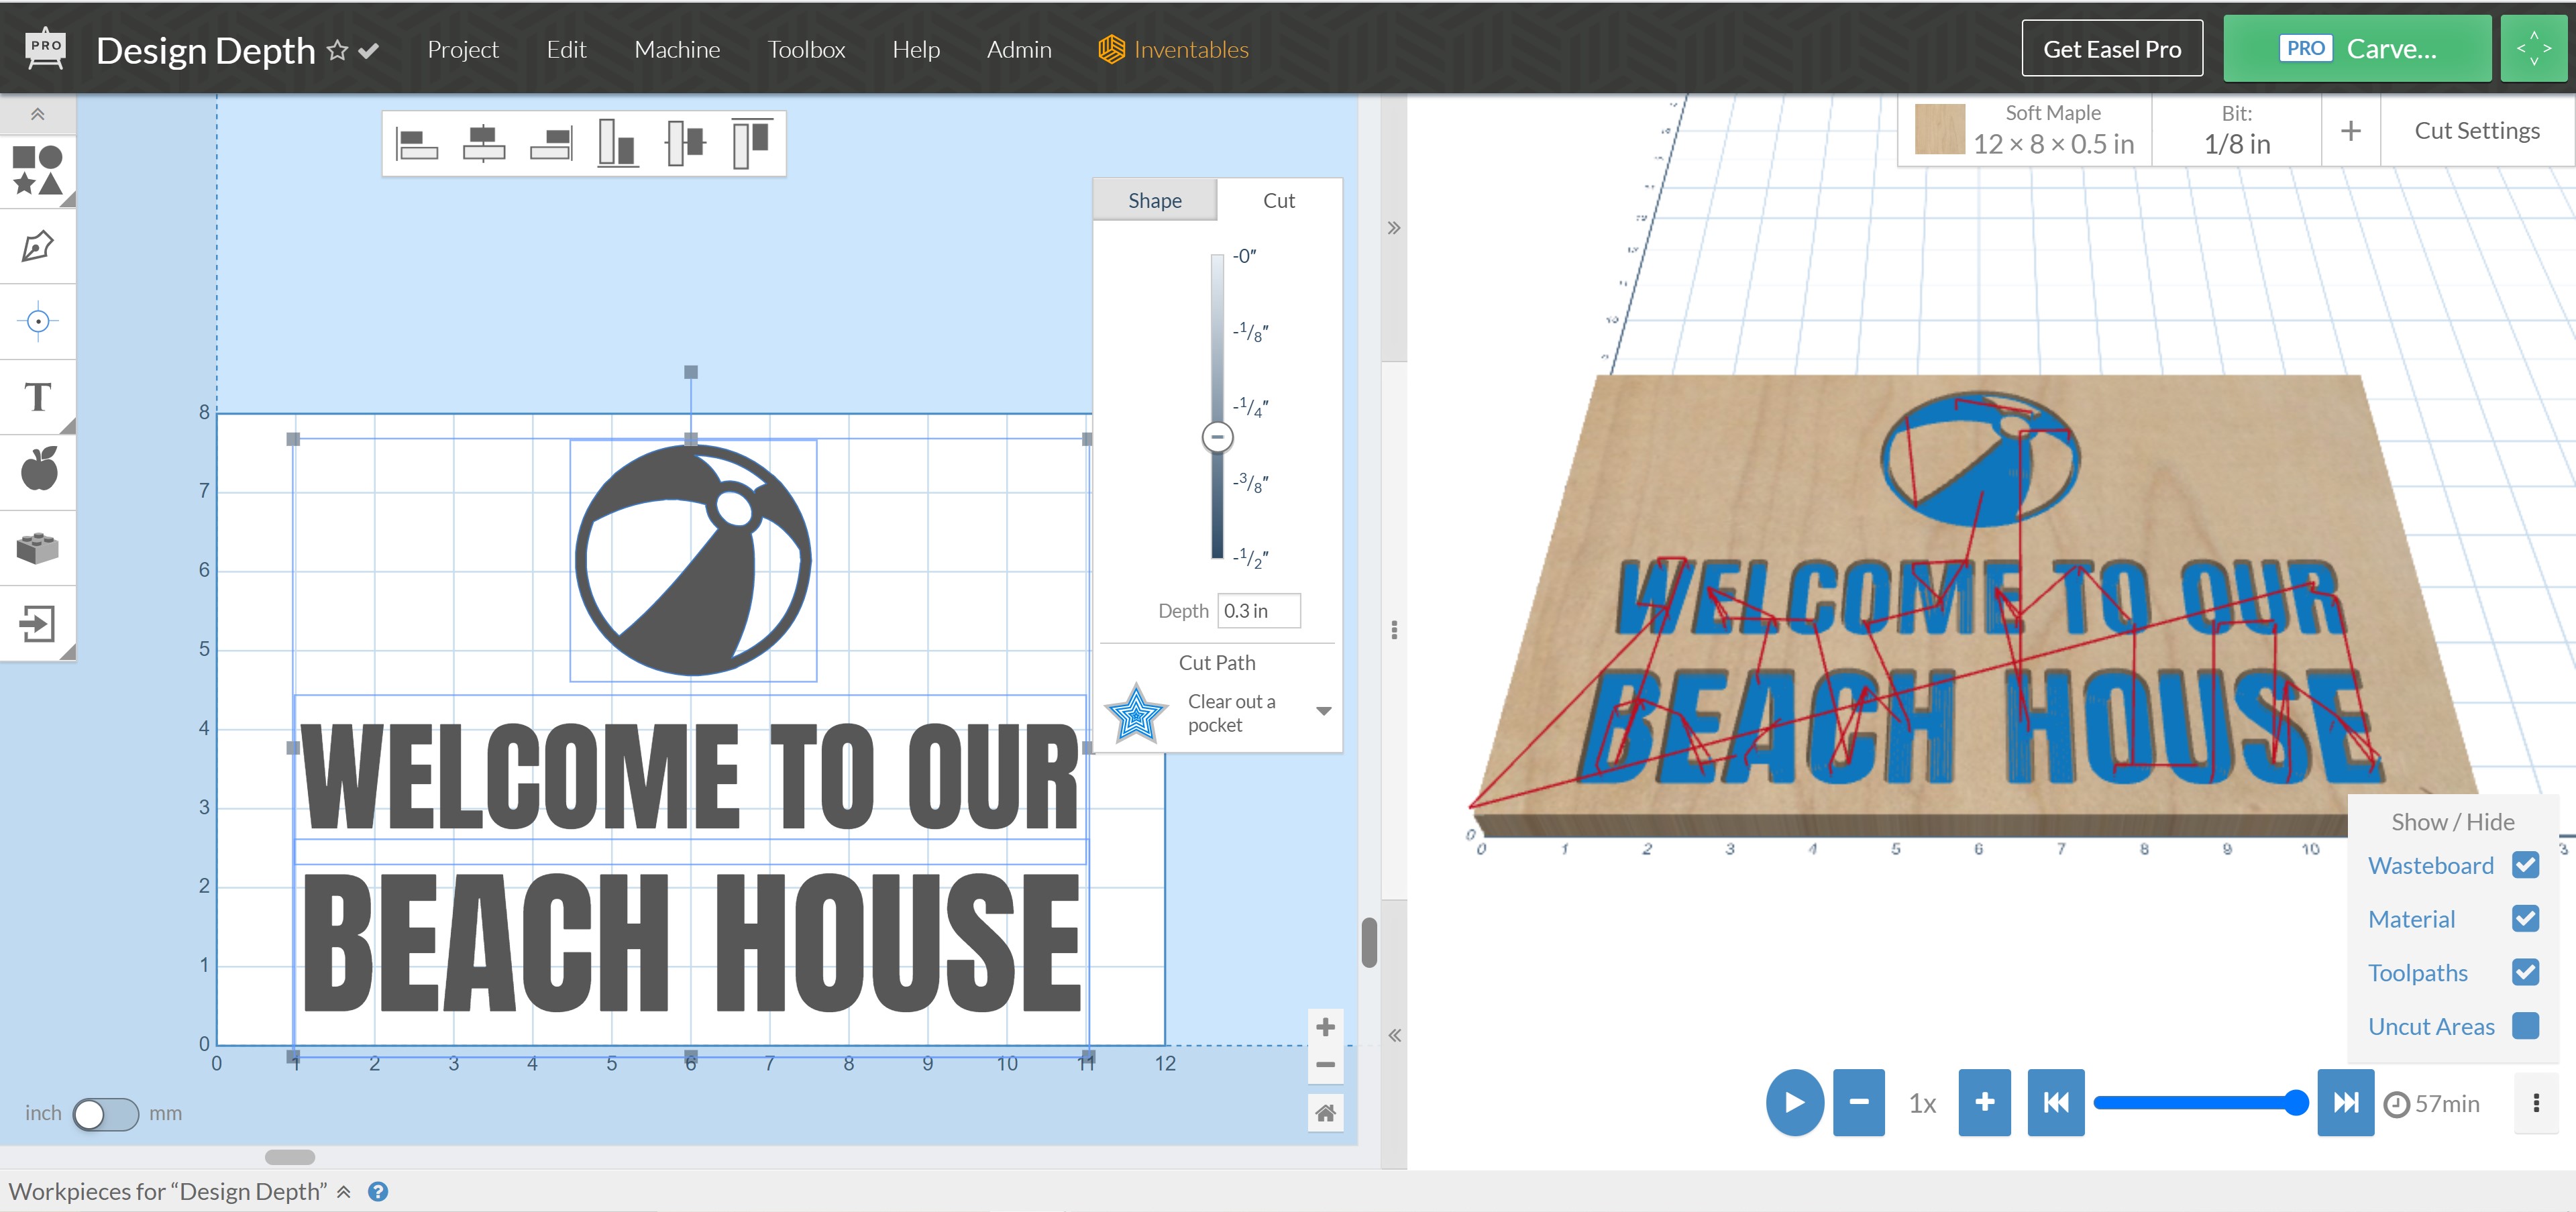
Let's take this project for a beach house sign as an example:
We are using a 1/8" bit on soft maple. The recommended settings are already pre-loaded into Easel for feed rate (how many inches your machine carves per minute) and depth per pass is set to .06 inches.
Right now, the overall depth of the project is set to .3" deep across all elements of the project. By clicking the "Simulate" button, we can see that this project will take around 57 minutes to complete.
However, we can use our depth per pass setting to control how many passes we want to carve and set the overall depth accordingly. If our depth per pass is .06", then setting the overall depth to .06" will mean that the carve will run in 1 pass. This will take approximately 11 minutes.
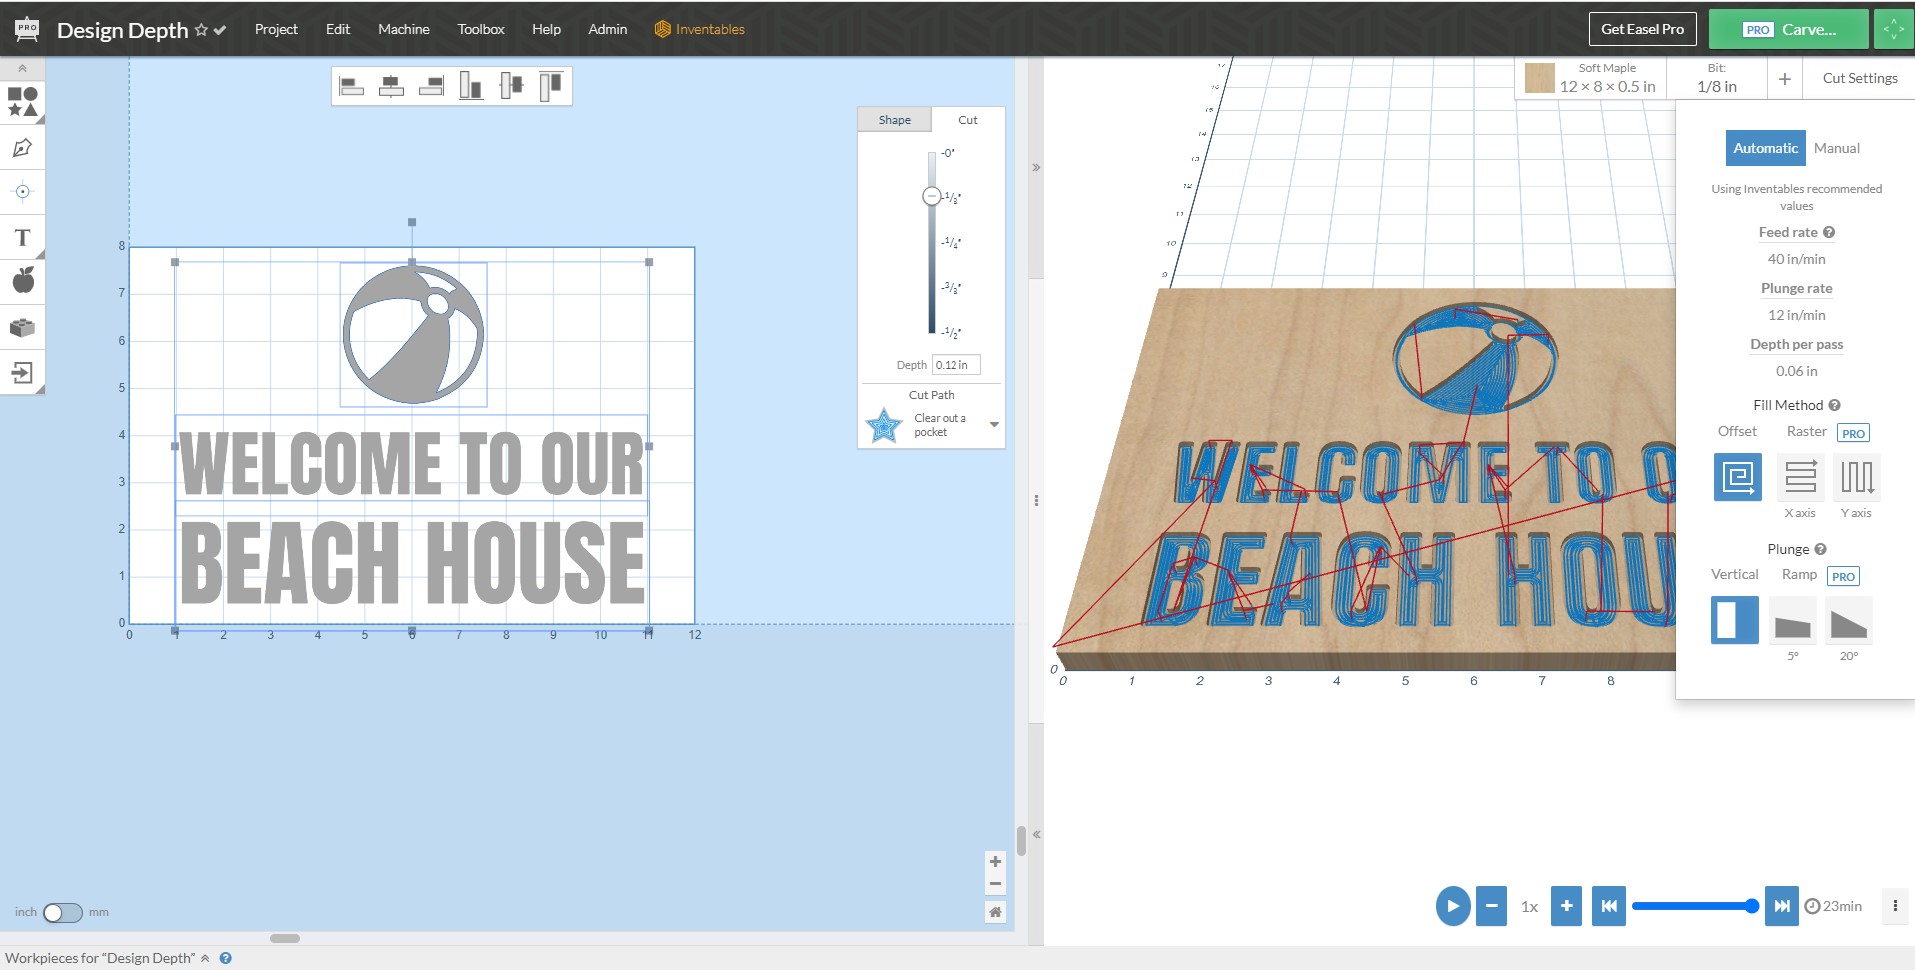
If I want to do 2 passes, I can multiply the depth per pass (.06 x 2 = .12) and change my overall depth to this new value. A .12" overall depth will take approximately 23 minutes.
Remember that depth per pass and overall cut depth work in conjunction with one another: changing one setting will impact the other.
** Please keep in mind that adjusting the depth per pass settings may require some trial and error. We recommend using Easel's predetermined settings when carving hard materials like aluminum, PCB, Corian, etc. If you are using an engraving bit or a bit smaller than 1/16", using a more aggressive depth per pass than what Easel recommends for your material may result in breaking your bit. If possible, do a test run of your project in a piece of scrap material to see how your machine responds to different settings. ***
While we suggest using Easel's recommended settings when you are first starting to use your machine, you may feel comfortable adjusting your Cut Settings over time.
We encourage you to play around with improving your depth per pass and overall cut settings to improve the efficiency of your projects. However, please keep in mind that working outside Easel's recommend settings may result in broken bits, burning of wood, or other less-than-desirable outcomes for your project.
Take the time to practice on various materials with different bits and settings to find what works best for your machine. When in doubt, always err on the side of caution and don't overexert your machine's capabilities. You can also check out this great resource on feeds and speeds or visit the forum to learn more about feed rates. The forum also provides great insight into what other makers use for different applications.